Based out of Chester County, PA, United States
mjacobs@theartofecology.com
570.497.9141
The Art of Ecology
Building visual connections between people and nature.
Sustainable Crafts: Part I
Are you going stir-crazy and desparate to find something to do? Below is a list of some of my favorite DIY ideas to inspire you! These are all projects that in some way benefit the environment, either by creating valuable habitat for wildlife or by reducing your own Carbon Footprint!

DIY Projects to Benefit Backyard Wildlife
- Butterfly Puddler (15-25 min., few materials, kid-friendly) – You may already have a bird feeder outside, but do you have a buttefly feeder (a.k.a. puddler)? By providing a place for butterflies to feed on nectar and sweet juices or minerals, you are attracting them to your yard and to the flowers that you may have for them! Click here for some butterfly puddler design ideas!

- Bird Feeder (25-30min., few materials, kid-friendly with help) – Don’t have a bird feeder either? Do you have an orange juice or milk carton in your recycling bin? Cut out a hole in one side, add a stick for a perch, and a string to hang it and you have a simple bird feeder! It’s always fun to decorate too with paint, craft moss or other weather-proof materials. Click here for a tutorial! Or, cater to your suet-loving feathered friends by building a pine cone suet feeder to hang outside! Click here for a suet recipe to smother your pine cone with.
- TerraCotta Toad House (10-25min. few materials, kid-friendly) – Looking to create more suitable habitat for our amphibious friends? A simple, terra cotta pot on it’s side can act as a great toad home! Simply decorate, take outside, and partially bury in your garden beds. This is a great project if you have some broken terra cotta pots hanging around! Just make sure that your pot is out of direct sunlight (terracotta can really bake) and may be near a water source for these amphibians. Click here for a simple instruction!
- Flower Pot Bird Bath (25-45 min, some materials, kid-friendly with help) – Do you have a ton of extra flower pots just hanging around? I know that I do! Simply bring them inside, clean them up and glue them together using hot-glue and some water-proof adhesives. Flip the first one upside down to act as a base, cover with glue and continue stacking smaller pots on top! Continue gluing pots together until it reaches your desired height. Then top it off with a ceramic pot base or pseudo-flat bowl. Great to decorate with outdoor paint or mosaics. Find out how to here!
- Insect Hotel (45min-1hr., lots of prepared materials, kid-friendly with help) – Attract all sorts of beneficial buggies to your backyard with an insect house! Note – this is NOT designed to be a bee house, but a hotel that attracts all varieties of insects. First, build a simple wooden frame together using craft wood or old wooden boards. Once you have the frame, start layering old scraps and cuttings of bamboo (a great way to put chopped down invasive bamboo to good use!), pine cones, sticks, hollowed out wine corks (must be natural cork and not treated foam!), seed pods, and moss or leaves! Then place it outside in a shady area! Over time, bugs will move in to their new habitat. Click here for some instructions.
- Snake Hibernaculum (1-2hrs, hardly any materials, kid-friendly with help) – Snakes love having just the right habitat to sun themselves while still being protected. By building a hibernaculum, you are providing snakes with the habitat to stay safe while also having the ability to soak up some much needed sun. Click here for DIY hibernaculum instructions!
- Brush Pile (30min-1hr, hardly any materials, kid-friendly) – Do you have a lot of twigs, storm debris, or other organic matter strewn about your yard? Clean them up by making a brush pile! This pile will encourage small birds, mammals, snakes, or other wildlife to make a home inside. Pile the sticks up and be sure to add sneaky-crawly spaces for animals to hide in! Click here for more info.
- Bird Boxes (30min-2hrs depending on box size/numbers, lots of prepared materials, kid-friendly with a lot of help) – Want to give birds like Bluebirds, Wrens, Owls, or other birds of prey a safe place to nest and raise their young? Try your hand at constructing a bird box! You will need box blueprints (certain birds require specific box dimensions), wood, hardware, and a good place to put the box up. Click here for some great box blueprints categorized by difficulty level (from kid-friendly to advanced!)
DIY Projects to Benefit You!
- Beeswax Food Wraps (1-2hrs, lots of prepared materials, kid-friendly with help) – Ditch the plastic and save food with reusable beeswax food wraps! Did you just have half a grapefruit for breakfast and want to save the rest without wrapping it in plastic wrap? These wraps will provide you with a great way to store food without the need for plastic. You will need beeswax, pine resin, jojoba oil, fabric squares, and the ability to melt the wax down. Click here for instructions.

- Terrariums (20 min., lots of prepared materials, kid-friendly) – I love houseplants and you should too! Even if you don’t have the greenest of thumbs, you can still enjoy making a terrarium. Air plants, Succulents, and Cacti are some easier plants to work with and this can be a great activity for setting up an indoor “fairy garden”.
- “Compost” Candles (20 min. with time to cure, lots of materials, kid-friendly with help) – Remember that half grapefruit I may have had for breakfast and wrapped the other half in beeswax wraps? Save the peel and make a citrus candle! Don’t compost it yet, use it! Simply stick a wick in the bottom of the citrus peel, melt down the wax (unscented is best since the peel will give off a citrus scent on it’s own when warmed!), pour into the peel, and let cure! Grapefruits, Oranges, and Lemons work well. Limes may be a little small, but could make for cute “tea-light” candles!
- Seed-Starter Newspaper Pots (15-30min, few materials, kid-friendly) – It’s spring and a great time to seed-start indoors! Make some biodegradable pots on your own by folding up toilet paper rolls or newspaper. Then, fill it with soil and your seeds! (Don’t forget to plant some butterfly host plants like dill, fennel, or parsely!)
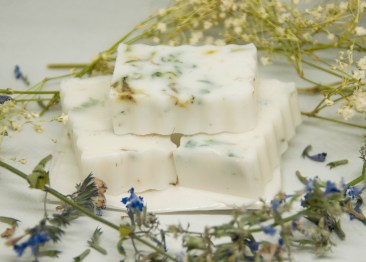
- Garden Glory Soaps (1hr. with time to cure, lots of prepared materials, kid-friendly with help) – Soap is in high demand right now, and is always a good thing to have on hand. Grab some goat’s milk, coconut oil, shea butter, and your favorite garden flower petals or herbs to make some soap with! Personally, I’m partial to Lemon Verbena or Lemon Balm plants (they make the soap smell so good!) with bits of cornflower or calandula petals in it for a splash of color. By making your own soap, you reduce the plastic packaging that soaps come in and are reducing your Carbon Footprint! Yay!

- Garden Luminaries (20-45min, lots of prepared materials, kid-friendly with help) – Are you sitting outside on your porch a lot right now? These luminaries, when combined with herb candles that repel mosquitoes, are great additions to porch-life! Collect and press your favorite garden flowers or plants, then sandwich them between wax paper and iron. Cut the wax paper-sandwiches into squares and tape together (I use floral washi tape to add some pizzazz, but clear works too) into 4-sided cubes. Place a candle inside and watch as the candle-light illuminates the pressed flowers! Maybe you can take your “compost” candle outside with you! Click here for more instructions.
Discussion Questions:
Looking to turn these DIY activities into educational tools? Below are some discussion questions to use when working with students. Apply them as needed!
- How does this project benefit the ecosystem? Is this helping animals or plants? How will animals use our creation? Will they use it as food, shelter, nesting location? What do animals need to survive and how are we helping them?
- How does this project reduce our own Carbon Footprint? What is a Carbon Footprint and why should we try to reduce it when possible?
- Does this project use single-use plastics? What are single-use plastics and why should they be avoided? How do plastics make an impact on the environment? How can we reduce our use of single-use plastics while creating these eco-friendly projects? (Click here for a Zero Waste Artistry Blog).
- Does this project use recycled/upcycled materials? While recycling is important, should we focus on recycling as the most important of the “R’s”, or are there others that we should utilize, like refusing or reducing? (Reduce, Reuse, Recycle, Refuse, & Rot)
- How can we use the skills here in other aspects of our life? Are we using skills of problem solving, collaboration, communication, or others? Are we using math, art, or science skills? How can we measure, record data and learn from this activity?
- Can we document changes in this project? For example, can we create a science journal to document our observations in the use of the toad home we created? What is the toad doing inside of it? How often is the home used? What do toads need to survive and how can we use that knowledge to make the toad home better? How does our bird box inhabitants change seasonally? What butterflies are using the host plants from the seed-starters? Recording your observations is a great way to learn more about the subject and find that you may have even more questions about them!

Supporting The Art of Ecology through the online shop or by becoming a Patron at any tier on Patreon can help keep educational content coming!
3 Comments on “Sustainable Crafts: Part I”
Leave a Reply

Hi! Thank you for featuring Christina’s DIY Beeswax Wraps! Just an FYI, you don’t need pine resin for these, just Beeswax, jojoba oil (it softens the wrap), fabric squares and we use an iron to melt the wax – they’re super simple to make!
Hi Sarah! Thanks for your comment! The ones that I’ve made in the past seemed a little…. weird… without the pine resin, so I included it, but it’s good to know that you don’t need that! It was hard to find, so that’s great to know! Thanks for that suggestion 🙂
Pingback: Sustainable Crafts: Part II - The Art of Ecology