Celebrate the summer season with some all-natural and sustainable crafts, designed to get you outside, learning more about local insect communities, investigating the summer blooms in a way that allows you to enjoy them year-round, and discovering the beautiful night sky in a whole new way.
This is part 5 of my “Eco-friendly” & sustainable art projects. Find more projects and sustainable activities below!
Nature-made Dragonflies

Did you know that dragonflies are the most efficient predators on the planet?! Dragonflies have a catch rate of roughly 95%, meaning that they are more successful hunters than hawks, big cats, reptiles, and other apex hunters! These incredible insects also have a fascinating life cycle and can be seen in a variety of dazzling colors. This craft gets you outside, harvesting nature materials to paint and design your own incredibly colorful hunter.
Methods:
- Gather twigs the size of your index finger to be the “body” of your dragonfly. Allow them to dry out of there was a recent rain.
- Gather Maple or Ash (pictured here) tree seeds (also called Samaras) to act as wings. You will need 4 per dragonfly. Allow them to dry out of there was a recent rain.
- Paint the body and wings of the dragonfly in bright, metallic colors, or research your favorite local dragonfly species (The Eastern Amberwing male and female are the dragonflies I used as inspiration here, but Green Darners are colorful too!).
- Hot glue the wings onto the body. Add string if you want to hang them!
Pressed Plant Stickers

Who doesn’t love the colors of fall foliage or the bright flowers of summer?! Keep these memories year-round, as well as to be used for arts and crafts or keepsakes. I love using these on journal pages, calendars (yes, I still have a paper calendar), and for stationary labels.
Methods:
- Harvest plants to press. Using a pressure pressing method will help flatten these flowers and foliage to be used for stickers.
- Keep plants in a press for 1-2 weeks, or until they are flat and fully dry. Be careful as you check them – fully dried plants can be very brittle!
- If you have “waterproof” sticker sheets, lay the plants on the top of the sticker paper, then cover the sheet in its waterproof sticker laminate. If you don’t have these sheets, stick clear packing tape over top of wax paper. Then lay the plants on top of the clear tape, and add another layer of clear packing tape. The wax paper acts as the sticker backing and can be peeled off (or slightly heated with a hairdryer if it’s hard to peel).
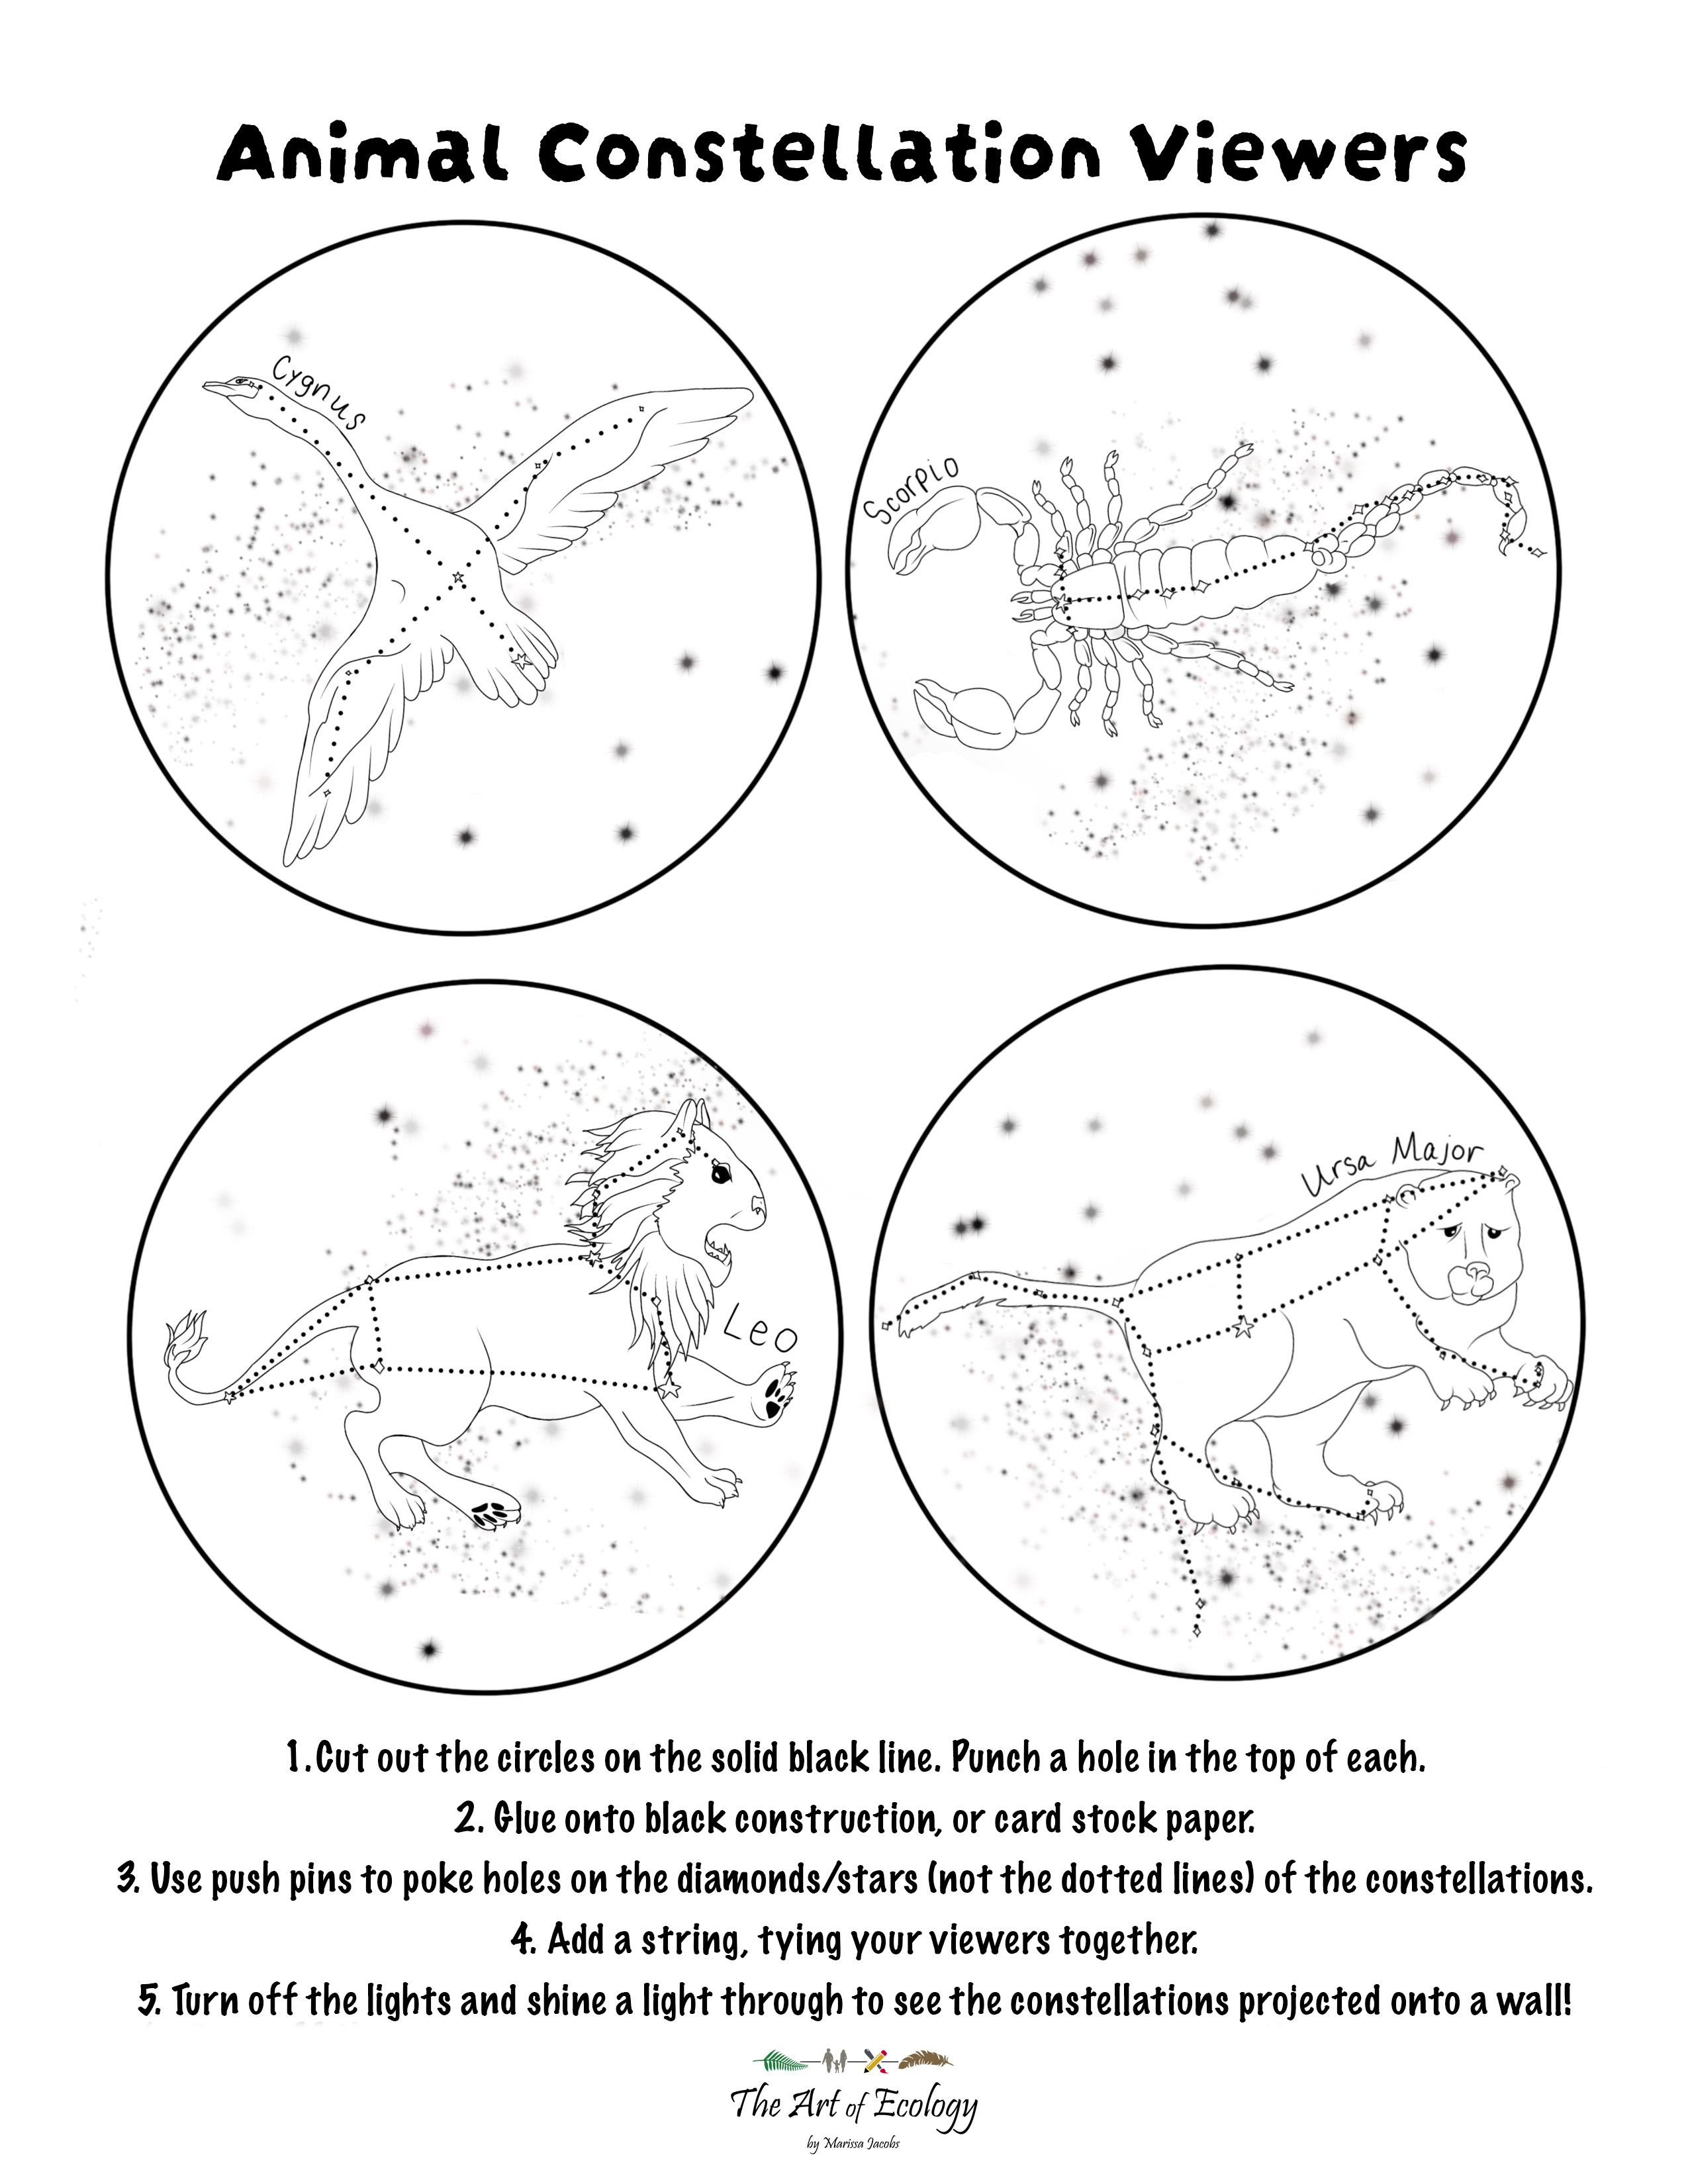
Constellation Viewers

One of my favorite activities growing up in the darkness of the Pocono Mountains (where there was very little light pollution!) was stargazing with my dad. Learning the story of the constellations, along with how to navigate using the stars was always fascinating to me! This is a great activity to use to practice viewing the constellations, then go outside and put your knowledge to the test in the winter, when it gets darker earlier.
Methods:
- Either, print out my template (Download it HERE) and cut out the pre-made constellation guides, or choose your own constellations to draw onto white paper.
- Glue your white paper onto black card stock or construction paper and draw on the constellations.
- Sit them on a cork board, or pin cushion, and use a thumb-tack to poke holes where the stars of the constellations are. You should see your drawing on the front, but on the back (the black side), you would only see the poked holes.
- Hole punch a circle to tie your constellation circles together.
- Hold the circle up to a bright window to see the pinpricks of light shine through, OR go to a dark room and shine a flashlight through the viewer to shine the constellation onto a wall or sheet.
- Go outside at night and see if you can use your constellation practice to identify what you see in the sky!